1. Set camera to RAW mode – so that you can record uncompressed .SER video:
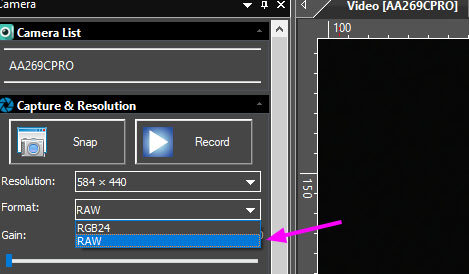
Always set RAW mode to capture .SER files
2. Set camera to 8bit mode for higher frame rate planetary video:
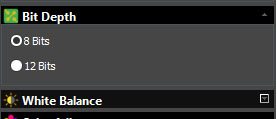
Setting camera to 8bit mode in the Bit Depth Menu
3. Setting capture file format to .SER video format (best for planetary, lunar or solar imaging):

3.1 Locate Options > Preferences in the AltairCapture top menu
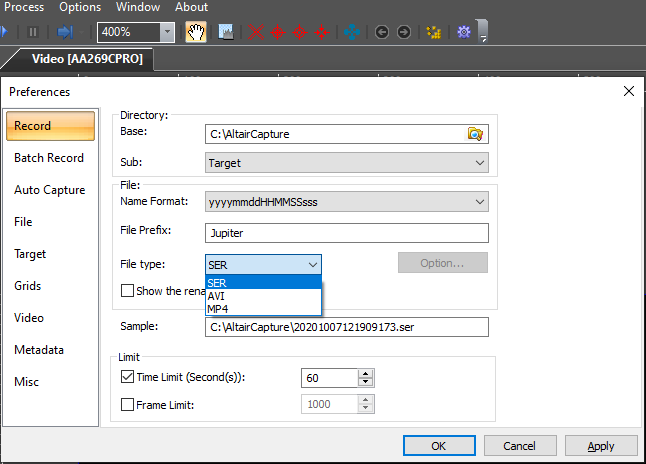
3.2 Set file format in Preferences Menu AltairCapture. Tip: Set video time limit to 60sec to limit the size of the .SER video.
4. Setting the correct exposure and gain levels for solar system imaging:
At this point we will assume you have the planet focused and framed, and have used ROI to constrain the field size of the video as necessary, and have set the Frame Rate or USB Speed to ensure reliable and continuous video capture.
Before starting the actual video capture, we need to set the exposure and gain for a good quality video:
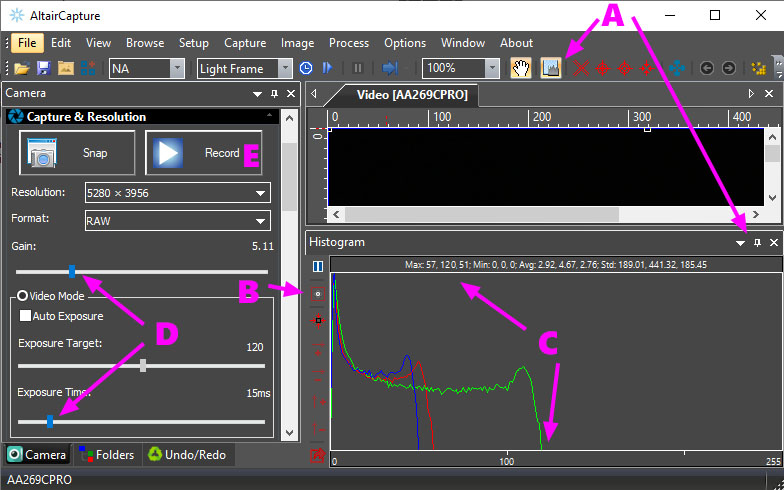
AltairCapture menu controls required for Step 4.
4.1 We first need to view the histogram to check the brightness levels to avoid overexposure and lost data. Click the Histogram Icon to launch histogram window. Then “Pin” the histogram window to the bottom of the screen using the little “Pin” icon.
4.2 Click Histogram Display Options icon shown in B above image. This window will appear:

Set histogram display to Logarithmic and tick the checkbox to display numerical information about the brightness levels
4.3 Observe the Max level reading labelled C. You need to ensure this remains below 120 levels out of 255 total, else you may overexpose the image and lose detail on highlights after stacking and processing the video. Many imagers never exceed 100 levels to avoid losing data. When set at 120 levels, the images will appear dim in the preview window, so you can temporarily increase gain to focus and frame the image as required. Even though the data may not appear bright enough this is just a preview, and the image can easily be “brightened up” in your final processing.
4.4 Now set the exposure and gain using sliders labelled in D above. Try aiming for under 25 milliseconds exposure if possible or less. The less the better and you can use the gain control to help achieve this target. Tip: Do not over-use the gain. Exceeding gain level 10 (10x) can create difficulties in processing the final image.
4.5 When ready, click Record button labelled E above and the video will be started and saved to your hard-drive. When you have enough frames (visible on the frame counter at the bottom of the screen), click Record button again to stop capture. The .SER file can now be checked in PIPP or .SER Player for quality.
